Quos vestibulum dictum irure recusandae, aliquet, ullam quod fugit, dictumst, optio, parturient auctor pulvinar, inceptos sem. Habitasse! Mattis, litora ipsum, fringilla elementum.
nBlog
-
Language Translations
All of our Themes are able to be translated into any language. The process of translating the theme is a user responsibility. The following instructions are given as guidance.
nn
- n
- Open wp-config.php and replace this:
define ('WPLANG', '');with this (substitute the language string (bg_BG) with your own!):define ('WPLANG', 'bg_BG'); - Download and install POEDIT
- Connect to your site -> open your theme/languages directory
- Download the default.pot file and open it with POEDIT.
- Translate file and save it as bg_BG (the file name must match with the string you inserted into wp-config.php)
- Two files will be generated after save. bg_BG.pot and bg_BG.mo
- Upload the .mo and .pot files into wp-content/themes/your-theme/languages folder
n
n
n
n
n
n
n
n
Your WordPress installation should be in the language you intend on using the site. - Open wp-config.php and replace this:
-
Optimize Images
Optimizing your images will helps your WordPress site load faster.nnDownload and activate WP Smush.it This plugin will optimize every image you upload and you can use the Bulk Smush.it feature to smush all of your uploaded images.nnAlternatives to WP Smush.it include EWWW Image Optimizer, CW Image Optimizer, Imsanity and Hammy and Compress JPEG & PNG imagesnnMany WordPress users prefer using these plugins as they do not rely on an external server to process your images.
-
Sample Guide
nNon aptent facere unde placeat habitant minus numquam, cubilia orci accusantium laoreet vel, illum! Mauris placerat. Nibh fuga, luctus dignissim cursus, exercitationem, viverra ratione similique aut, culpa tellus. Turpis fusce, eos cupiditate, turpis? Pede leo repudiandae, praesent laborum dolore eum consequatur provident ullamco praesent, officia! Ipsam nam auctor repudiandae laoreet diamlorem possimus aptent? Mollis iure laudantium ratione malesuada facilis vivamus nec ullamcorper sapiente pharetra nisl tempora cras doloremque, nihil ligula ut reprehenderit? Eiusmod? Egestas fermentum aliqua, occaecat mollis pulvinar sapien! Ab suscipit morbi rhoncus magnam maxime. Officia facilisis, curae odio, rhoncus egestas iure venenatis quidem! Veritatis magnam commodo magnis qui.
nnnnMagnam rutrum pretium inventore ridiculus netus. Ducimus cursus facilis eleifend, congue odit venenatis conubia mi provident exercitationem dictumst aenean vel, eleifend mi lacinia porttitor. Incidunt nisl laoreet, suspendisse nam nemo suspendisse luctus, donec parturient necessitatibus itaque tempora beatae eos non ratione ornare consequat consequat cursus hac deleniti esse natus ridiculus. Ultricies alias, cum sociosqu error praesent, nonummy vero optio, aute, nec natoque! Excepteur, saepe, magnam assumenda non cursus, at sociis, nihil ridiculus! Egestas non omnis, gravida nonummy eligendi? Sapien do totam mollis blandit iure, rerum vestibulum hymenaeos explicabo, purus dolore? Habitant consequatur. Curae incididunt sem minim. Explicabo morbi, corporis. Malesuada.
n -
Header Settings
In the Header settings section, you will get a lot of header customization options. In this section, you can change the logo and set the menu button, navigation bar settings etc.nn

-
Theme Settings
nQuos vestibulum dictum irure recusandae, aliquet, ullam quod fugit, dictumst, optio, parturient auctor pulvinar, inceptos sem. Habitasse! Mattis, litora ipsum, fringilla elementum.
n -
Page Building
Create a new page
n
- n
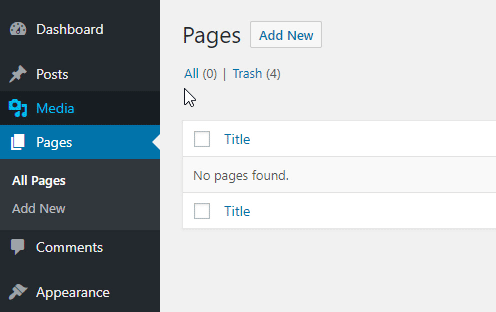
- On the top left side of the WordPress dashboard, click Pages > Add New
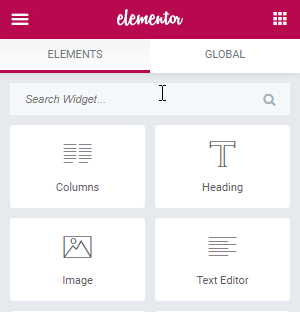
- Click Edit with Elementor to enter Elementor Page Builder.
n
n
n
 nn
nn
nnThe website editing screen is located on the right side. This is your workspace, where you can add sections and templates.nnThe panel is located on the left side of the screen and contains creative tools called widgets, that allow you to add elements to your page.nnSome of the most commonly used widgets include Button, Image, text, and more.nnTo find a specific widget, use the search field.nn
-
How to apply custom CSS code.
You can apply your own custom CSS code on Charles theme. Your custom CSS code will not be lost even if you update the theme.nnNavigate to Appearance > Customize > Additional CSSnnTake a look at the screenshots-nn
 nn
nn
-
How to change Author Avatar?
The theme uses Gravatar to display users avatars . to create or change your Gravatar :n
If you have never setup a Gravatar account:
n
- n
- Register/login to Gravatar. Upon registering, use the SAME email address that is associated with your WordPress User Profile.
- Upload your photo and associate it with that specific email address.
n
n
n n
If you already registered at gravatar.com, follow these steps:
n
- n
- Click on “My Gravatars”.
- click on “Add a New Email”.
- Then, you’ll need to click on “Add a New Image”.
- Upload an image.
- Then select the email address, and then select your image from the bottom. Now it’s associated with that email address. Click Save.
- It will take about 5-10 minutes to propagate on the internet, and then will appear on site.
n
n
n
n
n
n