All of our Themes are able to be translated into any language. The process of translating the theme is a user responsibility. The following instructions are given as guidance.
nn
n
Open wp-config.php and replace this: define ('WPLANG', ''); with this (substitute the language string (bg_BG) with your own!): define ('WPLANG', 'bg_BG');
nnOptimizing your images will helps your WordPress site load faster.nnDownload and activate WP Smush.it This plugin will optimize every image you upload and you can use the Bulk Smush.it feature to smush all of your uploaded images.nnAlternatives to WP Smush.it include EWWW Image Optimizer, CW Image Optimizer, Imsanity and Hammy. Many WordPress users prefer using these plugins as they do not rely on an external server to process your images.nn
In order to paginate your blog post, in the Write panel in your WordPress admin, switch to the TEXT view (if you are using the Visual view) and then enter the following code to wherever you want to break the post up into a new page:n
After installing the theme you most have to install the ‘Gullu Core’, ‘Visual composer’ and‘Codestar Framework’ plugins to import the demo content as well and work the theme correctly.nnYou will find all required and recommended plugins at Appearance > Install Plugins.
If you want your site to look like exactly the ‘Gullu’ demos then you have to import the demo content successfully.
nnnn
We integrated the One Click Demo installation feature to ‘Gullu’ WordPress theme. You can import all demo content just by a click only.
nnnn
OneClick Demo Installation Process
nnnn
Install the theme and activate it. Then install all the required plugins. Make sure all the required plugins are activated.
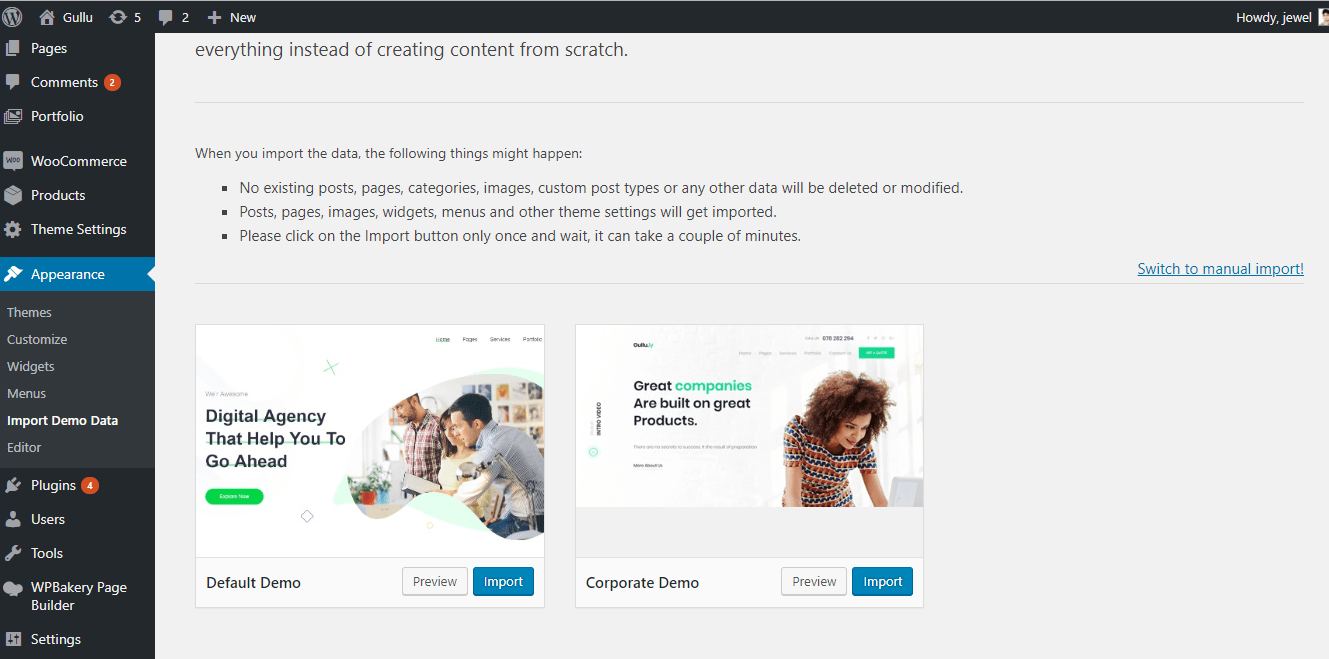
After activating all the required plugins navigate toAppearance > ‘One Click Demo Import’menu from the WordPress dashboard.
nnnnnnnn
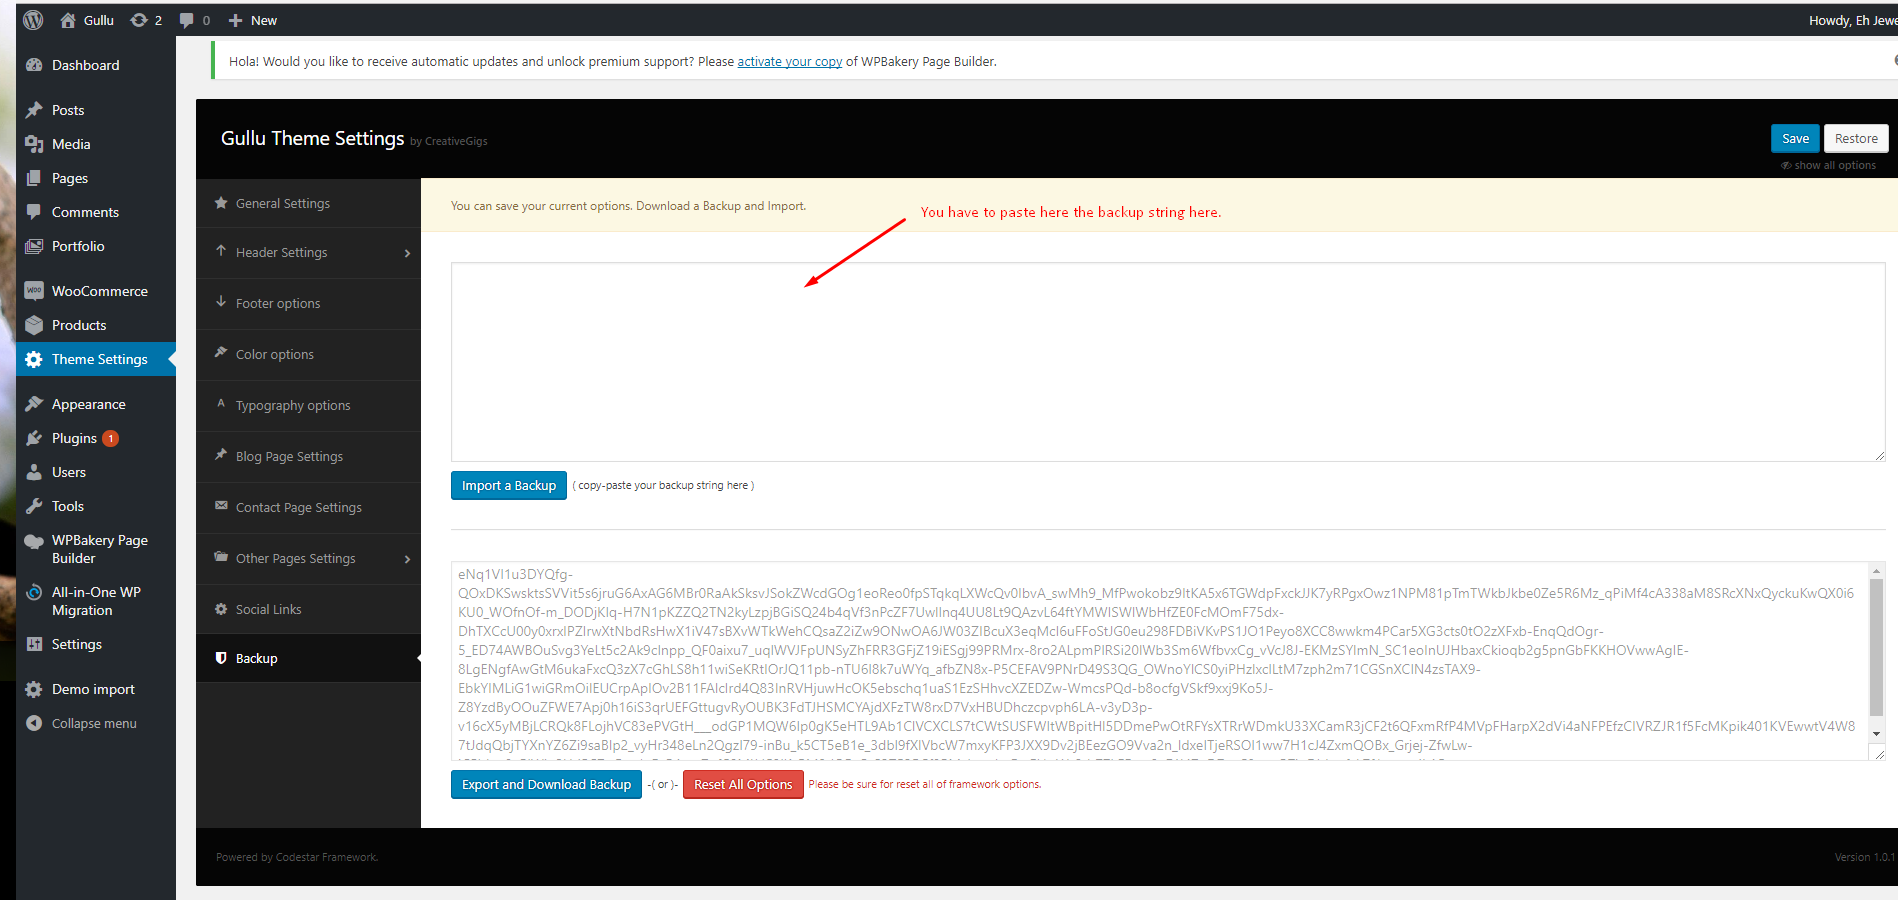
Note: If the option data do not import then you have to import it manually. Navigate to‘Theme Settings > Backup’. Then copy-paste the backup string here and click on the Import a Backup button. You will find the backup string in the options.txt file.
nnnnnnnn
The recommended method to import the demo content.
nnnn
If you failed to import the demo content by one click then you have to follow the below steps to import the demo content manually. You will get all demo content data with the theme package. You will find the demos in ‘gullu>inc/demo{disired-demo-number} this path.
nnnn
Navigate to Tools > Importthen install the WordPress plugin and click on the ‘Run Importer’. Upload here the ‘theme_content.xml’ file.
Install the ‘Widget Importer & Exporter‘ plugin to import the demo widgets. Then navigate to Tools > Widget Importer & Exporter and upload here the ‘widget_data.wie’ file.
Now you have to import the Dental Options as like the demo. Navigate to ‘Theme Settings > Backup’. Then copy-paste the backup string here and click on the Import a Backup button. You will find the backup string in the options.txt file.
Extract the zipped package downloaded from ThemeForest to your desktop, in the extracted package you will find the gullu.zip file which is the WordPress theme.nnYou can install the theme in two ways:n
FTP: Extract gullu.zip file and upload the extracted folder to /wp-content/themes/ folder on your server.nnWordPress: Navigate to Appearance -> Add New Themes -> Upload page. Select gullu.zip file. Press the Install Now button to upload and install the theme.n
nAfter uploading the theme, you have to activate it. Navigate to Appearance -> Themes page to activate the theme.
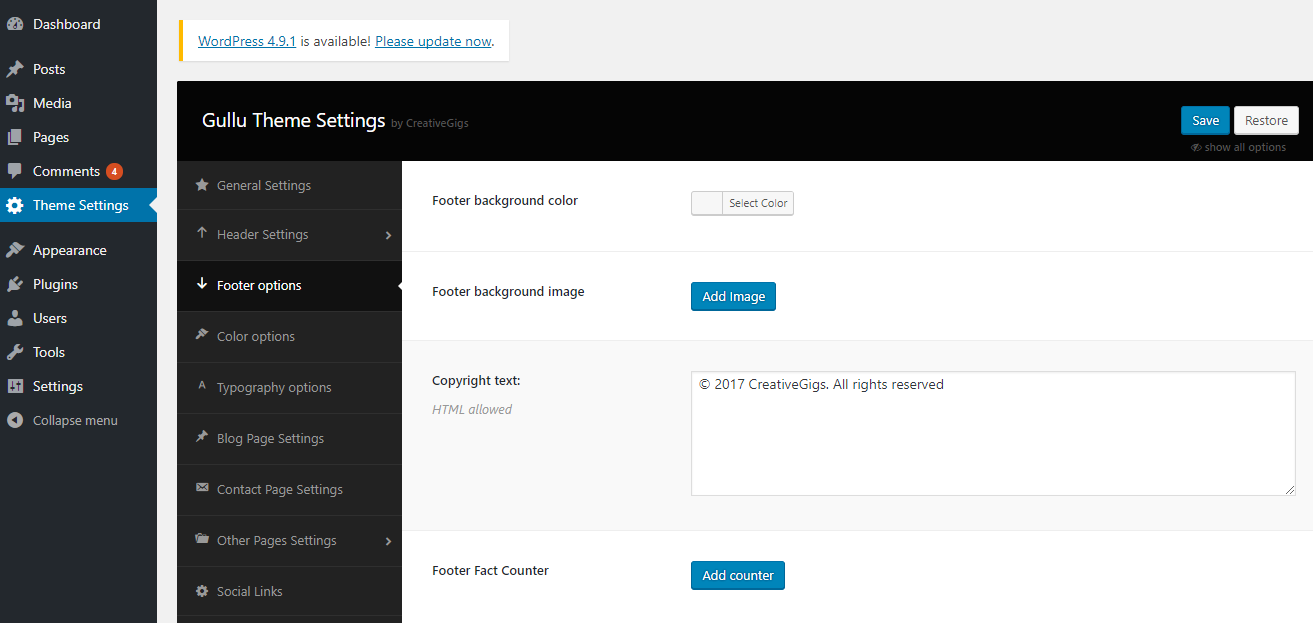
You can configure the footer area of the theme from the settings option. You will find all relevant section settings to the “Footer” option. Navigate to Theme Options > Footer Settings to go to this settings section. We provided all necessary instructions and descriptions with all the options.nnnn


 nn
nn