Quos vesti bulum dictum irure recusandae, aliquet, ullam quod fugit, dictumst, optio, parturient auctor pulvinar, inceptos sem. Habitasse! Mattis, litora ipsum, fringilla elementum.
nCategory: Uncategorized
-
Required plugins
After installing the theme you most have to install the ‘Faster Core’, ‘Visual composer’ and ‘Codestar Framework’ plugins to import the demo content as well and work the theme correctly.nnYou will find all required and recommended plugins at there Appearance > Install Plugins.
-
Demo Import
You have to import the demo content successfully if you want your site look exactly like the ‘Aprimo’ demo.nnWe integrated the One Click Demo installation feature to ‘Aprimo‘ WordPress theme. You can import all demo contents just by a click only.n
OneClick Demo Installation Process
n
- n
- Install the theme and active it. Then install all required plugins. Make sure all the required plugins are activated.
- After activating all the required plugins navigate to Appearance > ‘One Click Demo Import’ menu from the WordPress dashboard.
n
n
n
 nnNote: If the Theme Settings data do not import then you have to import it manually. Navigate to ‘Theme Settings > Backup’. Then copy-paste the backup string here and click on the Import a Backup button. You will find the backup string in the options.txt file. You will find the options.txt in this path- inc/demo{disired-demo-number}/txtnn
 nnFind your page:nEvery demo has 3 pages including the Default homepage, Gradient homepage, and the Particle background homepage. Navigate to Pages from your WordPress dashboard menu to see all pages. Take a look the below screenshot-
n
n

n
Navigate to Settings > Reading to set your specific page as the front page (homepage).n
The recommended method to import the demo content.
nIf you failed to import the demo content by one click then you have to follow the below steps to import the demo content manually. You will get all demo content data with the theme package. You will find the demos in ‘aprimo>inc/demo{disired-demo-number}’ this path.n
- n
- Navigate to Tools > Import then install the WordPress plugin and click on the ‘Run Importer’. Upload here the ‘contents.xml’ file.
- Install the ‘Widget Importer & Exporter‘ plugin to import the demo widgets. Then navigate to Tools > Widget Importer & Exporter and upload here the ‘widgets.wie’ file.
- Now you have to import the Dental Options as like the demo. Navigate to ‘Theme Settings > Backup’. Then copy-paste the backup string here and click on the Import a Backup button. You will find the backup string in the options.txt file.
n
n
n
n
-
Theme Installation
Extract the zipped package downloaded from ThemeForest to your desktop, in the extracted package you will find the aprimo.zip file which is the WordPress theme.nnYou can install the theme in two ways:n
FTP: Extract aprimo.zip file and upload the extracted folder to /wp-content/themes/ folder on your server.nnWordPress: Navigate to Appearance -> Add New Themes -> Upload page. Select aprimo.zip file. Press the Install Now button to upload and install the theme.nnAfter uploading the theme, you have to activate it. Navigate to Appearance -> Themes page to activate the theme.
-
Shortcodes
This section will introduce you how to use the Faster‘s shortcodes.nnThose are our custom shortcodes developed and integrated with the Visual Composer (VC) plugin. So you can use our shortcodes with Visual Composer drag and drop interface.nnYou will find all VC integrated shortcodes to VC Add Element popup box’s “Faster” tab.nn
 nnYou can build a specific Faster design element with those shortcodes.nnYou must have to install the required plugins “Faster Core”, “CodeStar Framework” and “Visual Composer” to use all shortcodes as well. All shortcode elements will appear in Visual composer’s shortcode elements popup box (Faster Tab). Take a look at the above screenshot to see all shortcodes.nnNote: You can import a demo and check to see how a shortcode working and displaying.
 -
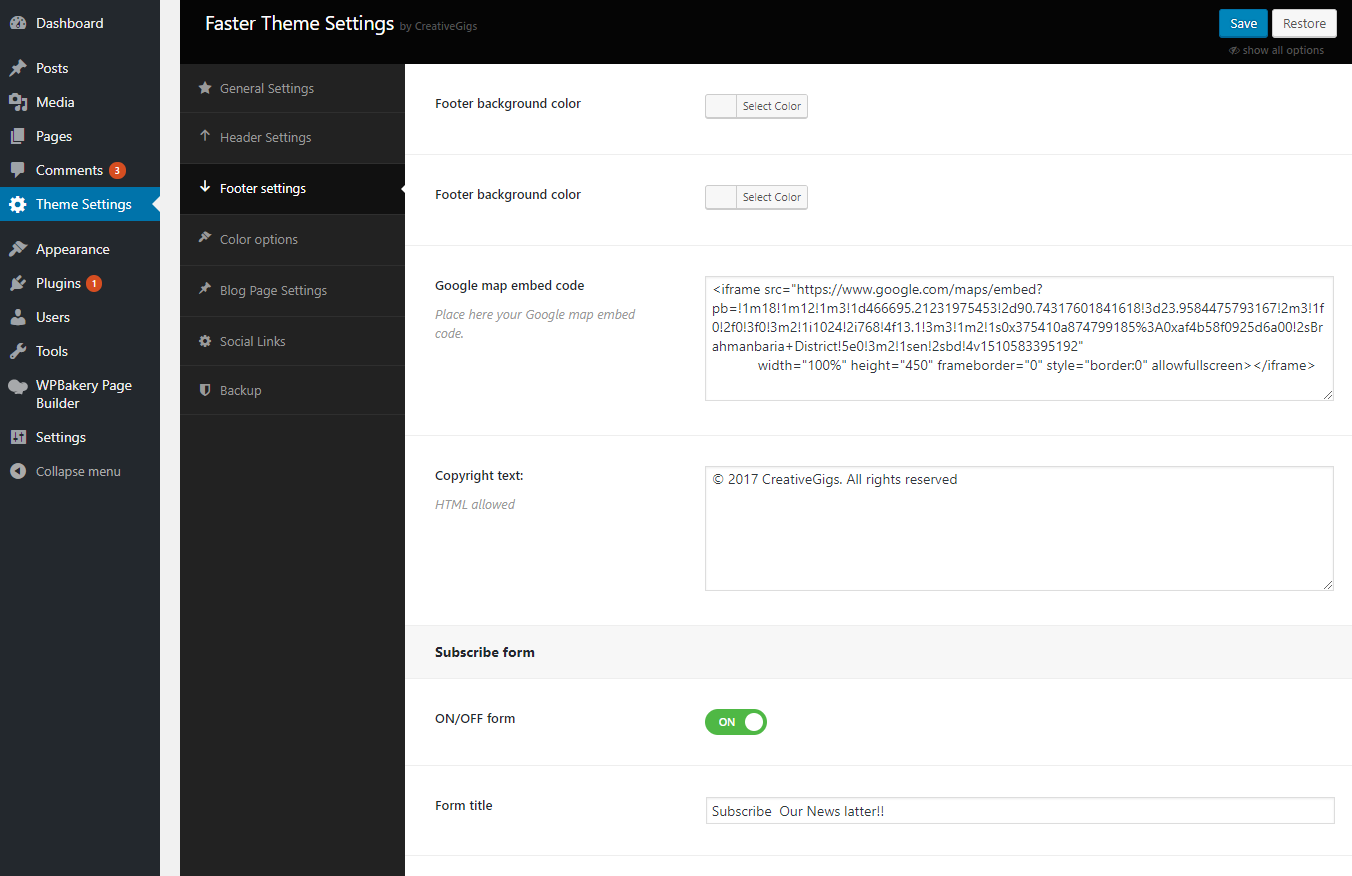
Footer Settings
You can configure the footer area of the theme from this settings option. You will find all relevant section settings to the “Footer Settings” option. Navigate to Theme Options > Footer Settings to go to this settings section. We provided all necessary instructions and descriptions with all the options.nn
-
Header Settings
In the Header settings section, you will get a lot of header customization options. In this section, you can change the logo and change the page/post’s Title bar padding, Page margin-top, Title bar overlay color etc.nn

-
Theme Settings
nYou can control the theme’s functionality and customize theme’s content from the Theme Settings page. Here you will find all relevant settings to customize the theme.
nnnnThis section will provide you an in-depth guide on how to use the Theme Options. To access the Theme Settings page, go to- Dashboard > Theme Settings. You will find this page at the top of the Appearance menu.
n -
FAQs
nSupposed to be commonly asked issues, questions & troubleshoot tricks are in this section.
n -
Getting Started
Before building your site, better take a look at this section.